
Hey there Teachers! This post is part of my Flipped Learning series. For more information on the magic of the flipped classroom (and what I'm even talking about) check out this page.
I've got tutorials on free flipped learning tools like:
- How to make digital flash cards for your students to study before class
- How to make your own audio recordings & places to find audio resources
- How to create online "quizzes" that teach your students the grammar point before you present it in class
- And just when you thought you'd collapse under all this great information, I'll show you the lesson planning system that not only ties it all together, but actually saves you oodles of time while giving more value to your students.
Onward!

Think of how often your class grinds to a halt because a few students are just not getting what you're laying down. In a typical 60 minute lesson, you have only a few minutes to elicit the target language, and if only a few students are still confused, you have to make a decision—move along with your lesson or pause and try to re-explain (if you can). When that happens, it's hard to get all the way through to your final activation exercise, and the point of the lesson is lost.
Now, think of how many videos scroll through your social media feed every hour. There are millions of English learners scouring Youtube for "the difference between for and since" or the correct pronunciation of "through". Why not provide this to your students before the lesson, giving your slower students a leg up and saving your lesson from derailment? It benefits your student to get their English from more than once source. If you're American, try using British teachers, a vice versa.


Why not provide this to your students before the lesson, giving your slower students a leg up and saving your lesson from derailment? It benefits your student to get their English from more than once source. If you're American, try using British teachers, a vice versa.

The only problem with using Youtube videos is that selecting the right videos can be time-consuming. You have to view the video and make sure it suits your students/ needs. That's why in my Trello for TEFL system, I have already pre-watched dozens of videos, and added them to the appropriate lesson card, with copy-&-paste email language ready to send to your student. Now all I have to do is view the following weeks lesson cards, copy, paste and send!
Want a list of my favorite ESL YouTube Channels? Get the eBook>>
How to make your own videos with LOOM
Making your own videos might seem daunting. No one likes to see their own face (or hear their own voice!) when played back. But, remember, your students like your voice & your presentation, because they hired you in the first place! Do it for them. Value over vanity.
The tech-phobic might think making videos takes expensive cameras, recording software and a Youtube channel where the whole world can see them. None of this is true! In the tutorial video below, I'll show you how with a free application called LOOM, you can make a video right from your computer and email it directly to your student.
Loom videos can showcase both your face and your "blackboard" which is just your screen. In this tutorial, we'll use both to create a short video for our students.
1. Go to USELOOM.com and sign up for an account. When you sign up for Loom (using the Google Chrome browser), you will get the Loom symbol in the top right of your browser. This is what you’ll click when you’re ready to record a video.

2. Create a "blackboard" with the relevant info already typed out. This is optional, but it is nice to have words on the screen for Beginners and Intermediates.
I prefer to use slide presentation software like Keynote (mac) or Powerpoint (pc or mac) or Google Slides (web app) rather than a word document. That way, you can drop and drag words, shapes, lines, photos. Slide presentation software is just easier than a word doc.
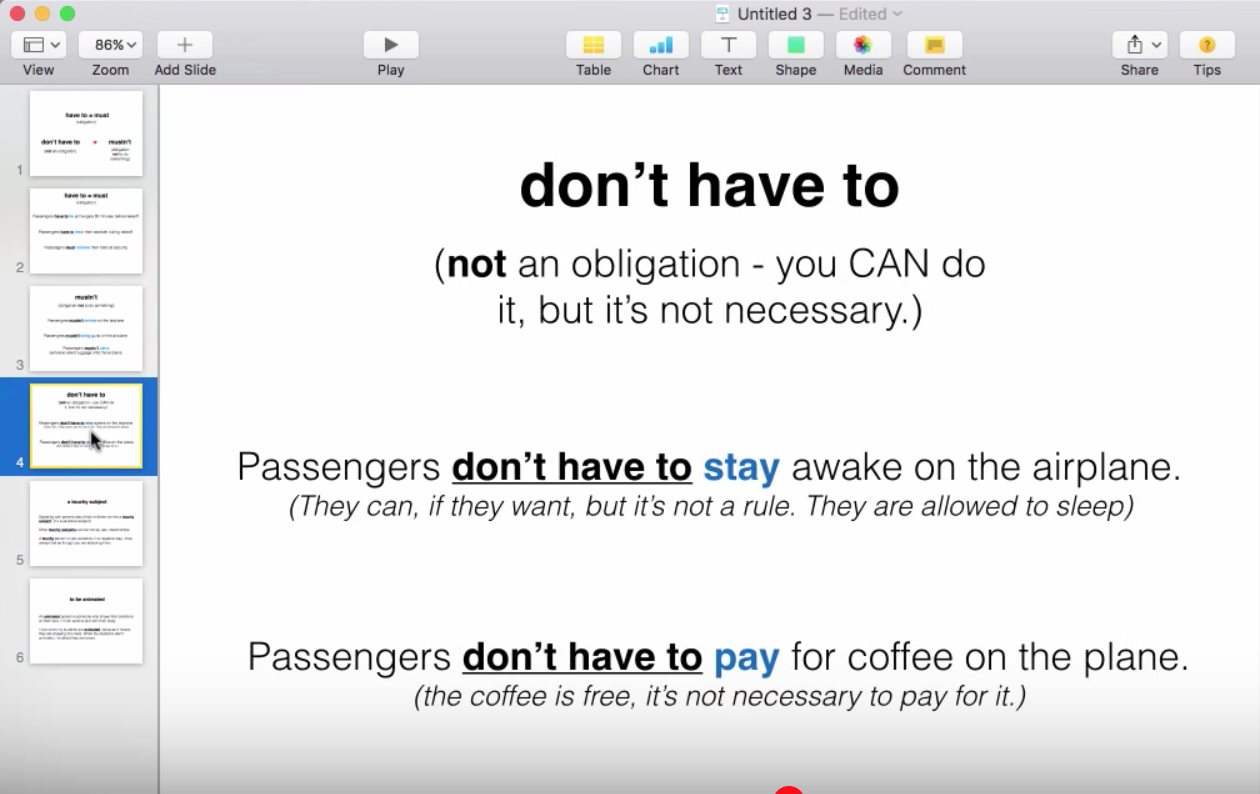
I'm going to teach the difference between "mustn't" and "don't have to" because I know that this is a tricky grammar point for ALL my students. This way, I can pre-teach it in a quick video, and once they get to class, their questions will be more informed and focused.
I created 4 slides with information that I want to "board," just like I'd use to explain it in class. You can add photos to make your slides more interesting, or to be more descriptive, but it's not necessary.


3. When your slides are ready, go into your Google Chrome browser and click the Loom icon.
4. This box will pop up, giving you three options for recording - Screen & Cam (show your face & the blackboard) Screen Only (blackboard only) and Cam Only.
**If it is important for you to have your blackboard and your face in the video (Screen & Cam mode), you will need to use Google Slides (rather than Powerpoint or Keynote) to create your blackboard. Why? Well, right now, Loom only supports the camera mode when you’re in a Google Chrome web browser. You can still record your Keynote or PowerPoint slides, but your face will not be in the video.

If you really want your beautiful mug on there, here’s what you do:
- make your slides in Google Slides from the start; or
- make your slides in Powerpoint and then go to slides.google.com. Start a New Presentation. Go to file >> import slides >> chose the Powerpoint presentation you want to import into Google Slides.
5. Click Start Recording.

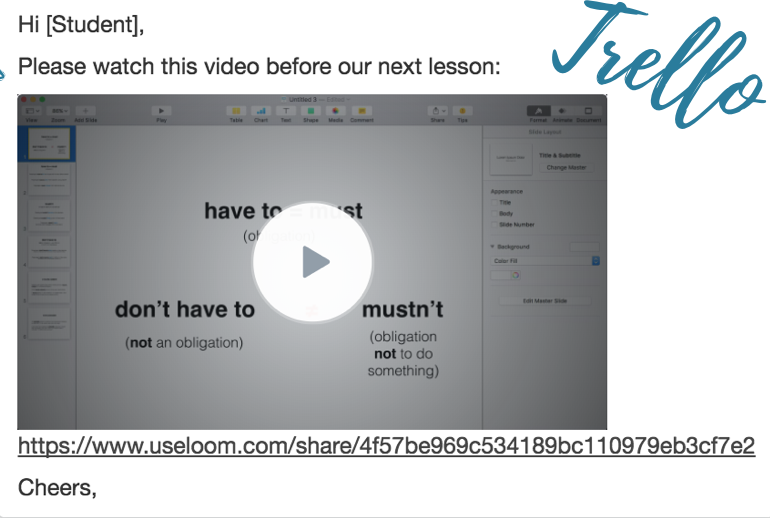
6. After you stop the recording, you can share your video by clicking copy link. You can send it directly to a student, if it’s relevant only to them, but I know I’m going to want to send this video to anyone whom I teach “Have to” and “Must”, so I’ll save the link to my Trello for TEFL card.
Now, I want to hear from you! Think of your typical lesson plan. What components could give to your students to ahead of time that would make your lesson go more smoothly?
- Could you send them an introductory Google "quiz" to get them familiar with a grammar point before you present it?
- Could you teach twice the amount of vocabulary if your students had the opportunity to study them on digital flash cards before class?
- Could sending a video or an audio recording before class make the class more interactive and the discussion deeper because students were able to watch/listen as many times as they wanted on their own time?
Tell us in the comments below: What's a single, small way you could flip your next lesson?